Dead trees don’t tend to fall politely. One minute, they’re standing firm, and the next, they’re crashing through sheds, fences, or even roofs.
So if one’s lurking in your garden, now’s the time to deal with it, before nature does it for you.
Spotting the Warning Signs Before It’s Too Late
The first step is observation—careful, deliberate, and from a safe distance. Dead or decaying trees often show warning signs if you know what to look for.
Deep cracks in the trunk, brittle bark peeling away, or hollow sounds when tapped may all point to internal rot. Watch for dangling limbs or those peculiar leans that suggest the roots may no longer be doing their job.
Don’t just glance and guess. Mushy spots or fungal growth near the base typically mean advanced decay. You’ll also want to check the tree’s proximity to houses, sheds, fences, or power lines. Even a small miscalculation could result in costly damage.
If anything feels uncertain—if the tree’s height makes you squint or the lean raises an eyebrow—it’s wise to speak with a qualified arborist.
What looks stable from the ground can be anything but once the cutting begins.
Gearing Up for a Safe and Smooth Job
Tree removal is no job for a rusty handsaw and wishful thinking.
Not only is having the right equipment useful, but it’s also essential for safety. Start with a quality chainsaw that’s sharp, reliable, and familiar. If you’ve not used one in a while, give it a proper check.
Safety gear is non-negotiable. A tough helmet and impact-resistant goggles protect you from flying splinters, while heavy-duty gloves help prevent cuts. Add steel-capped boots to the list, too. Your toes will thank you.
If the tree’s particularly tall, a secure ladder is essential. Never climb without someone steadying it, and never overstretch.
Strong rope comes in handy for guiding branches away from fragile targets, and a wood chipper makes light work of clearing smaller bits.
Additionally, keep a first aid kit within easy reach. Hopefully, you won’t need it, but if you do, you’ll want it immediately. Always double-check your tools before starting. Faulty gear and falling trees rarely end well.
Getting the Timing and Planning Just Right
There’s a quiet art to removing a tree. It’s not just about hacking away until it topples. Good planning is what separates a clean fall from a chaotic mess. First, decide where you want the tree to land.
Visualise the arc, allow for bounce, and choose a zone free from sheds, pets, and anything else you’d prefer intact.
Mark out your escape path. If things go awry, you’ll need to move quickly. Make sure it’s clear and leads somewhere safe.
Also, notify neighbours, especially if the tree borders other gardens or could send debris their way. Take note of overhead cables, as branches and power lines are a dangerous mix.
Time matters too. Don’t rush to finish before sunset. So, choose a calm day and allow ample daylight to work safely and tidy up afterwards.
Step-by-Step: Bringing It Down with Care
Once the kit is ready and the area cleared, it’s time for the main event.
Remove low-hanging branches and any debris around the base. This gives you space and reduces snags mid-cut.
Next, make a notch cut on the side facing the direction you want the tree to fall. It should form a 70-degree angle and go about one-third into the trunk. This guides the fall.
Then make the felling cut on the opposite side. Cut slightly above the notch, keeping it level and steady. As the tree begins to shift, retreat to your escape route and avoid lingering.
Once the tree is down, start with the limbs, working from the base upward. Then cut the trunk into manageable sections. Don’t try to drag the entire tree. Instead, reduce it piece by piece.
This process, known as tree felling, is as much about preparation and restraint as it is about strength.
The Stump: Remove It, Work Around It, or Let It Be
With the tree gone, what remains is often the most awkward bit: the stump. Some see it as quirky, others as a stubborn eyesore. Either way, it’s best dealt with sooner.
The quickest option is a stump grinder. These noisy beasts make short work of even the toughest wood, reducing it to mulch. Wear protection and keep others at a distance.
Prefer something quieter? Manual removal is an option, though not for the faint-hearted. Dig around the stump, expose the roots, and hack away until it gives way. It’s hard graft but oddly satisfying.
If patience is your thing, natural decomposition might suit. Drill holes, add nitrogen compost or stump remover, and let nature do its slow magic. It can take years but needs little effort.
Whichever route you choose, fill the hole with soil to avoid tripping hazards and make way for fresh planting.
What to Do with All the Debris
Once the tree and stump are gone, attention turns to the aftermath.
A tangle of branches, chips, and leaves can quickly overwhelm a space if ignored. That’s why sorting early keeps things tidy.
Separate the materials into piles: branches, logs, and foliage. Branches can be chopped down to fit garden waste bins or used for compost. If you have a chipper, convert smaller bits into mulch.
Are there larger logs? Offer them to local firewood schemes or community gardens. Many welcome these, especially in rural or allotment-rich areas. It’s a thoughtful way to give something back.
Beyond that, check your local council’s rules. Many offer green waste pickups or run drop-off sites. Some even partner with composting schemes that are surprisingly efficient and eco-friendly.
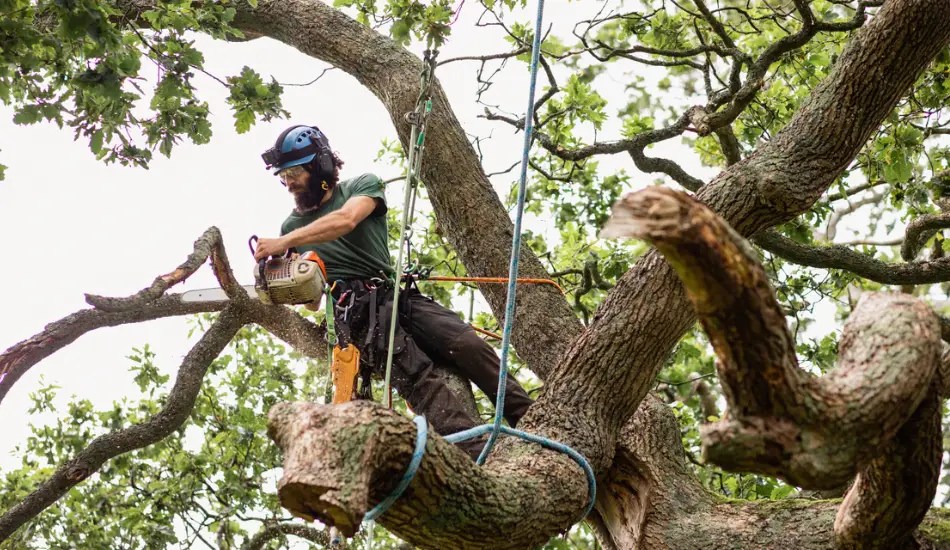
When the Job’s Best Left to the Experts
Not all trees should be tackled alone. If power lines loom overhead or the tree leans near buildings, call the experts.
Highly skilled tree surgeons have received risk management training in addition to having the necessary tools.
Additionally, always check for accreditation and insurance. Get two or three quotes and read reviews. Good arborists will explain their approach, anticipate challenges, and leave your garden neater than they found it.
They’ll often include stump removal too, saving you the bother. In tricky spots—tight access, protected wildlife, or fragile surroundings—professional judgement is worth every penny.
Know the Rules Before You Cut
Before you saw a branch, check the legal ground. Trees near boundary lines may not be solely yours. Always confirm property lines, especially in shared spaces.
Some trees, particularly mature ones, can be protected. You might need a permit before cutting begins. It’s best to check with your local council first.
And if the tree sits near a neighbour’s garden, have a quiet word. It avoids disputes and keeps relations civil. A little courtesy goes a long way.
Conclusion
Tackling a dead tree takes a little planning, patience, and some respect for the risks involved. Whether you do it yourself or bring in specialists, the aim is always safety first.
Both your garden and your neighbours will be all the better for it.